Have a Question?
Configurando notificações para os clientes
This article aims to present a basic configuration of notifications about the fulfillment steps. We understand that it is important to keep the customer informed of the progress of their demand, offering the option of notifying the stages of service through a common communication channel for customers, in addition to the system interface.
In this example, communication via e-mail will be addressed, simplified in the following steps:
- Receipt of the call;
- Progress;
- Conclusion;
- Closure.
Receipt of the call
The call can come through several communication channels, being LigeroSmart's common and native way to receive the occurrences via the form in the client interface or via e-mail. In this step, it is registered which demand is being sent to the service team, as well as the number of the call within the system
Progress
Forwarded according to the service performed within the system, according to the classification of the call given by the attendants, or by previously programmed processes.
The information in these steps can be passed on to the customer in the form of a notification, keeping them informed that their demand is already being analyzed and forwarded for resolution.
Conclusion
With the call in the hands of the competent team, and proper customer service performed, the result of the analysis, as well as the solution adopted, can be recorded and notified to the customer.
Here, the call is kept in a status to wait for the customer's response, giving the chance both to review the solution adopted, and to give an answer about what can be improved and revised in the service.
Closure
If the service performed is to the satisfaction of the customer, the call is closed and the customer is notified.
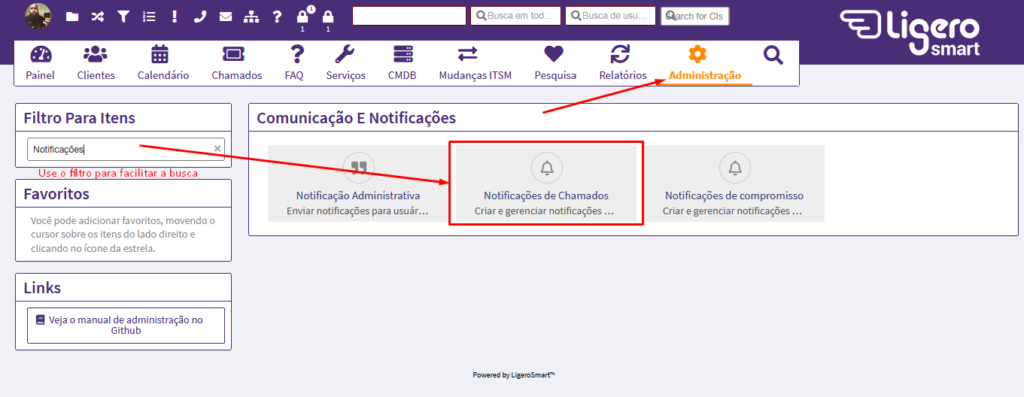
Setting up notifications in LigeroSmart
With a user with admin permission, you must access Management -> Call notifications. There will be a list of previously registered notifications that can be validated or invalidated (activate/deactivate) for each type of action applied to the tickets. Notifications for the steps described above can be scheduled here.
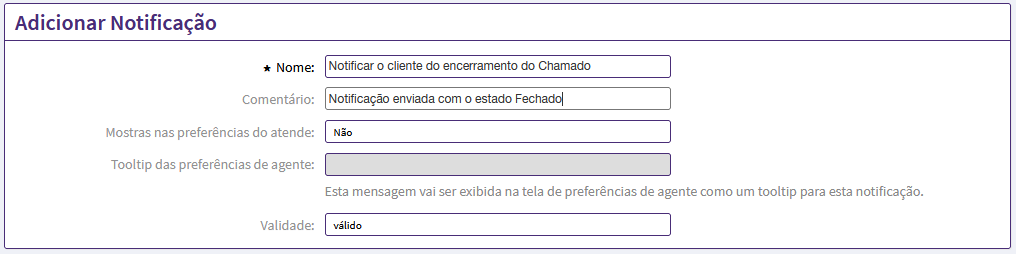
To add a new notification, click Add Notification in the Actions menu on the left. In the form that will open, fill in the fields with the necessary information.
- Name: name to identify the notification in the system
- Validity: establishes the status of the notification, being valid (active in the system. The notification is sent according to what is programmed in the events and filters) and invalid as disabled (notification is not triggered under any condition)
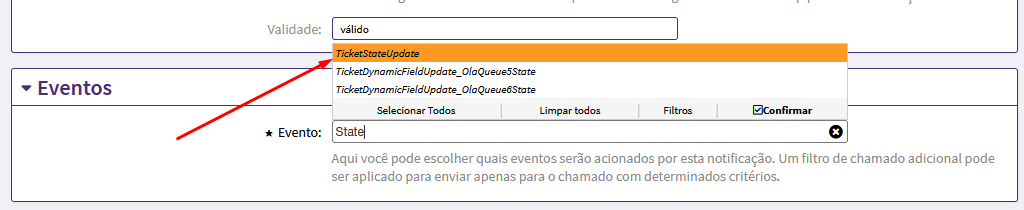
- Event: within the system there are defined several steps of actions within the tickets. In this Event field, it is defined in which of these steps this notification will be triggered. See the list of possible events for notifications at the end of the post.
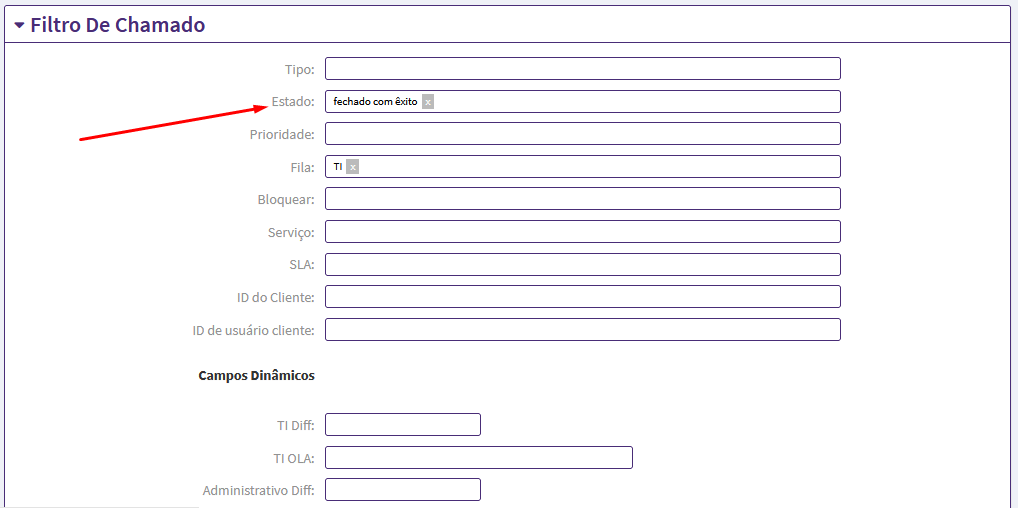
- filters: There are two types of filters for notifications: Ticket filters and Article filters. In each of them there are fields where you can establish criteria for which the notification will be triggered. For example, do you need the notification to be triggered only when the ticket state is new? Edit the State field putting the respective value.
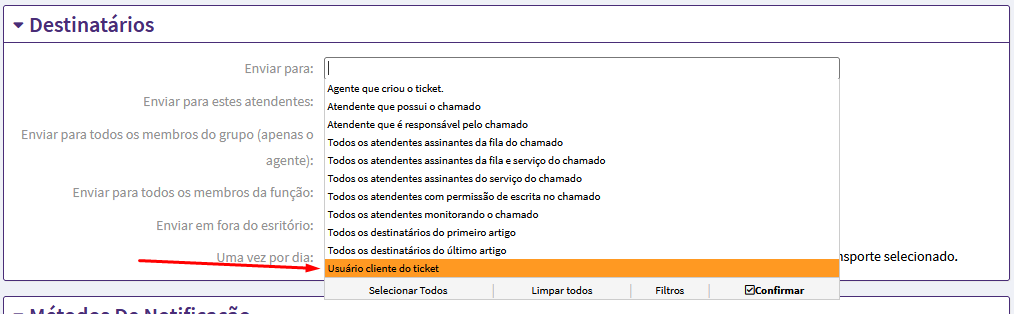
- Recipients: Notifications can be sent to both the customer and the attendants, and under several other conditions set out in this filter.
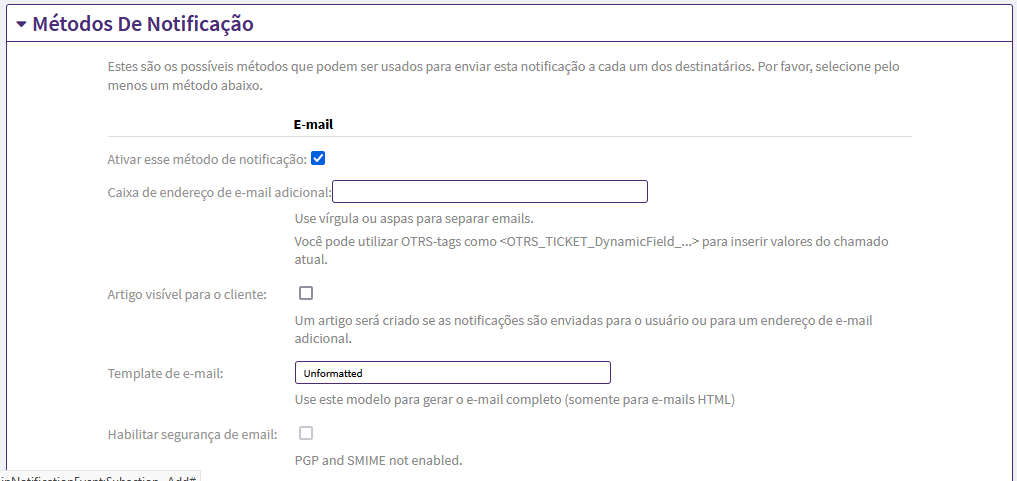
- notification methods: here we establish which communication channel will be used. Here you can use more than one channel and it is still possible to expand these channels with modules to be installed in the system. At first we have the channel via email or chat (RocketChat)
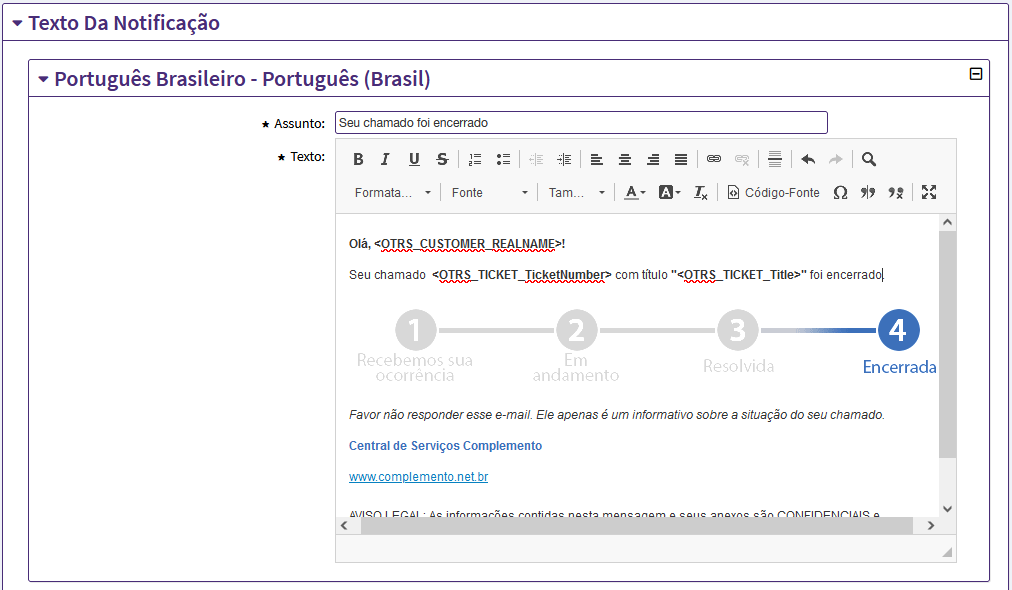
- notification text: in the part of the text that will be presented to whoever receives the notification, it is separated by language. Note that depending on the language selected in the user preferences (or the system's default language) a type of text is sent.
- In this text it is possible to include information (Tags) of the call, such as the number, name of the current queue, current status, etc. The reference of this information is embedded in the text through tags, whose reference is at the end of the form.
Once all these parameters of the notification are established, just click on To save and the notification is available in the system.
In each step described at the beginning of this article, it is possible to establish the configuration of these notifications and include the criteria. If you need help planning this setup, please contact us.
List of events for triggering notifications:
ArticleCreate – when creating a new article in the system (notes, answers, etc).
ArticleSend – when sending an article by email.
ArticleBounce – when returning a call (Return button).
TicketCreate – In creating the call.
TicketTitleUpdate – When changing the title of the call.
TicketUnlockTimeoutUpdate – When the call is automatically unblocked.
TicketQueueUpdate – When the call changes queue.
TicketTypeUpdate – When changing the call type.
TicketServiceUpdate – When the calling service is changed.
TicketSLAUpdate – When the ticket has its SLA changed.
TicketCustomerUpdate – When a customer is assigned to the ticket or when it is changed.
TicketPendingTimeUpdate – When the pending time and date is changed.
TicketLockUpdate – When a call is blocked or unblocked.
TicketStateUpdate – When the status of the call is changed.
TicketOwnerUpdate – When the owner of the same is updated.
TicketResponsibleUpdate – When the person responsible for it is changed.
TicketPriorityUpdate – When the call priority is changed.
TicketAccountTime – When the time of a call is changed.
TicketMerge – When a call is grouped with another.
TicketSubscribe – When someone starts monitoring the call.
TicketUnsubscribe – When an attendant stops monitoring a call.
EscalationResponseTimeNotifyBefore – when a ticket reaches the security notification time for first response (notify by X%).
EscalationResponseTimeStart – when the first response time runs out.
EscalationResponseTimeStop – when the first response time is met (on or off deadline).
EscalationSolutionTimeNotifyBefore – when a ticket reaches the security notification time for resolution (notify by X%).
EscalationSolutionTimeStart – when a solution time elapses.
EscalationSolutionTimeStop – when the solution time is met (on or off deadline).
EscalationUpdateTimeNotifyBefore – when a ticket reaches the update notification time (notify by X%).
EscalationUpdateTimeStart – when the update time runs out.
EscalationUpdateTimeStop – when the update time is met (on or off deadline).
Tag Reference:
<OTRS_AGENT_SUBJECT[20]> To fetch the first 20 characters of the subject (from the attendant's last article)
<OTRS_AGENT_BODY[5]> To fetch the first 5 lines of the body (from the attendant's last article)
<OTRS_AGENT_*> To get the article attribute (ex. , ,).
<OTRS_CUSTOMER_SUBJECT[20]> To fetch the first 20 characters of the subject (from the last customer article)
<OTRS_CUSTOMER_BODY[5]> To fetch the first 5 lines of the body (from the client's last article)
<OTRS_CUSTOMER_REALNAME> To get the customer user name of the ticket (if provided).
<OTRS_CUSTOMER_*> To get the article attribute (ex. , ,).
<OTRS_CUSTOMER_DATA_*> Current customer user data attributes (ex. ).
or Data attributes of the current user who owns the ticket (eg. or ).
<OTRS_RESPONSIBLE_*> or Data attributes of the current user responsible for the ticket (eg. or ).
<OTRS_CURRENT_*> Attributes of the current agent user that requested this action (ex. ).
or Attributes of the notification recipient user (eg. or ).
Call data attributes (eg. , , ,).
<OTRS_TICKET_DynamicField_*> Internal value key of the dynamic fields of the ticket (eg. ,).
<OTRS_TICKET_DynamicField_*_Value> Dynamic ticket fields display values, useful for Dropdown and Multiselect type fields (ex. ,).
Configuration Options (eg. ).