Have a Question?
Criando um Chatbot simples em formato de URA com o Botpress
In this tutorial, we will present a simple way to create an IVR with Botpress, which will in turn direct the visitor to a department on Rocket.Chat.
Here, we will simply show a greeting, a list of options and we will leave the Rocket.Chat integration part for a next tutorial, both for interaction and for transfer to a human.
Setting up the flow
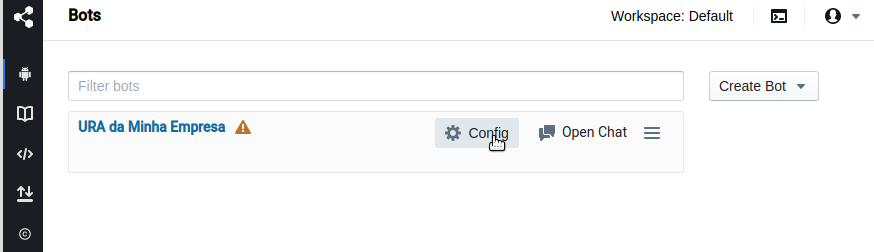
First, log into your Botpress and go to “Create Bot” -> “New Bot”

Fill in a bot name, id and choose the template “Empty Bot”. Click on "Create Bot"
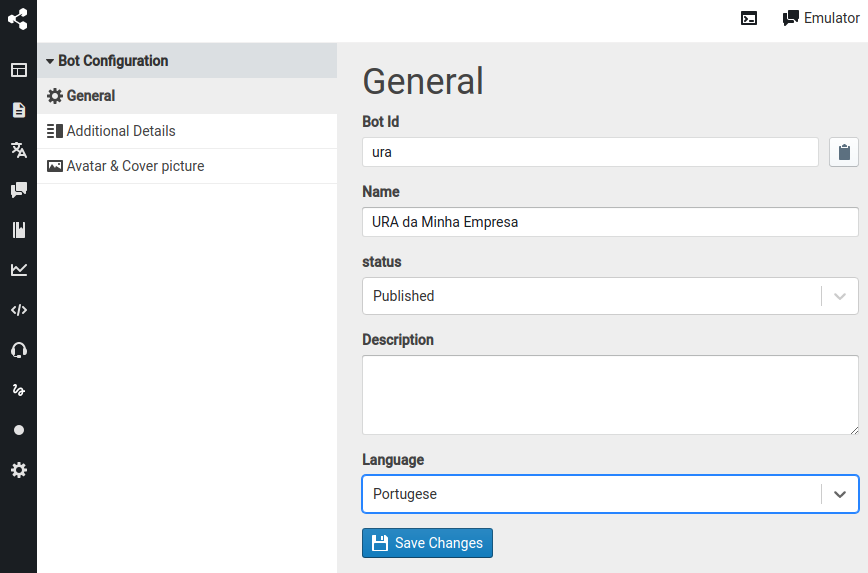
Let's first define the Bot's default language. Click on Config:
Change the language and click on "Save Changes":
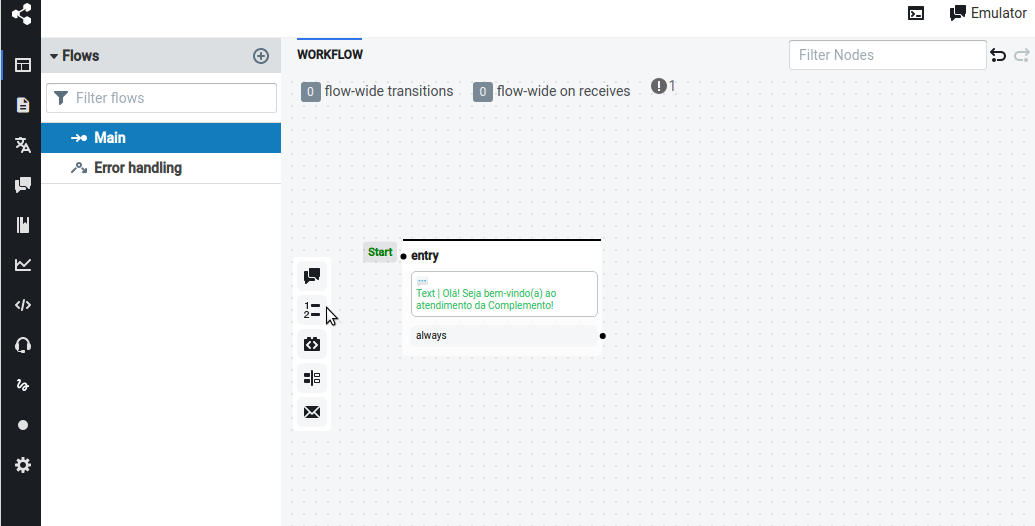
Now let's go to the part of drawing the flows, although our bot, in practice, only needs a step or two. Click on the "Flows" button:
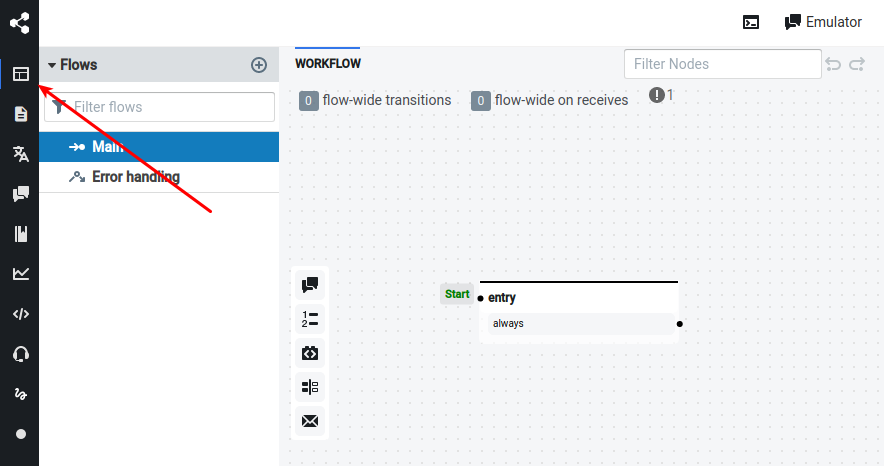
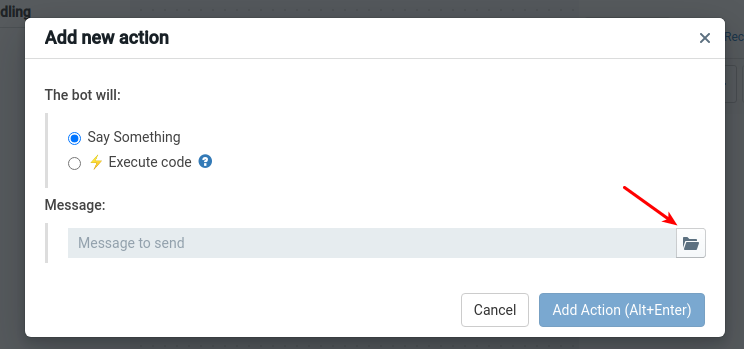
Now let's add a greeting for visitors:
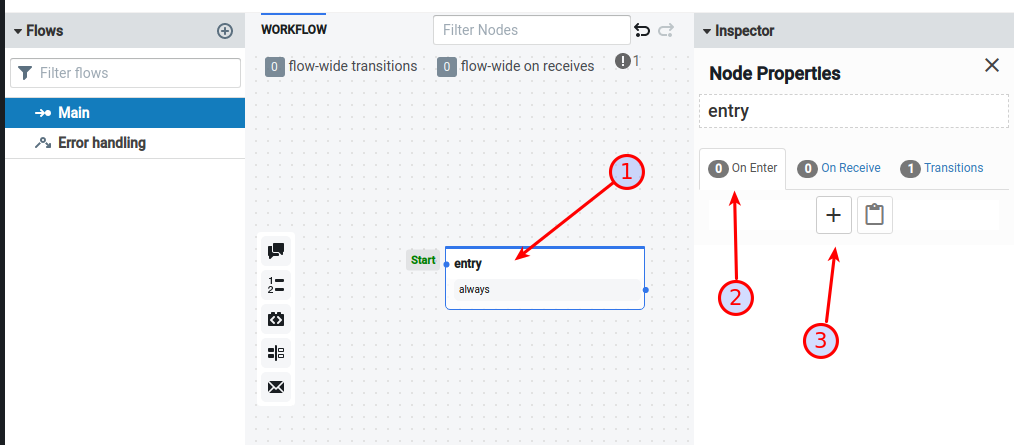
1 – Click on the “entry” node
2 – Make sure you are on the “On Enter” tab
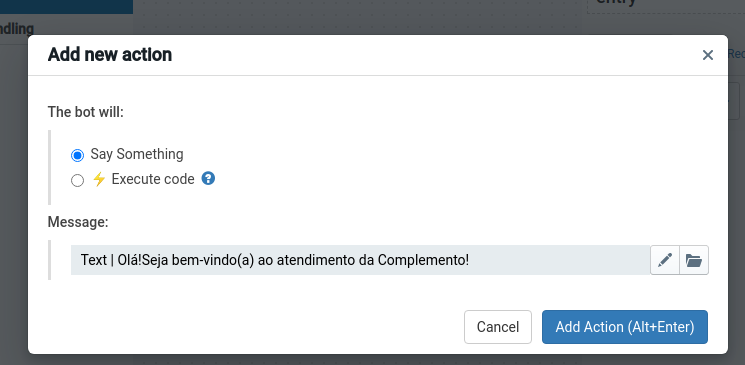
3 – Click on the “+” sign to add a text.
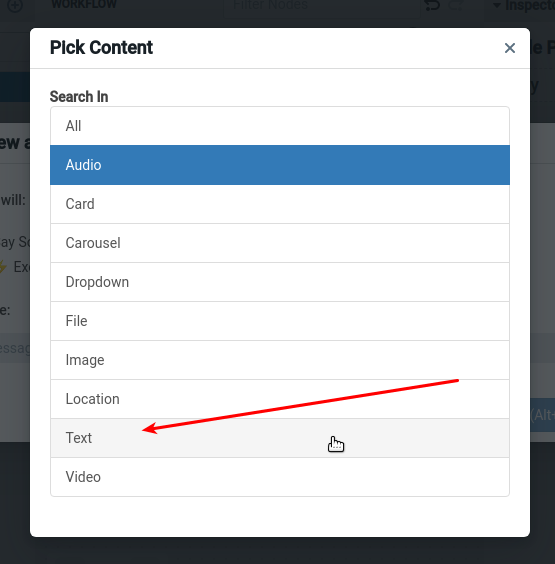
A popup will appear and you must click on the “Folder” to select the element that will be added. In this case, we will still create the text:
Click on "Text"
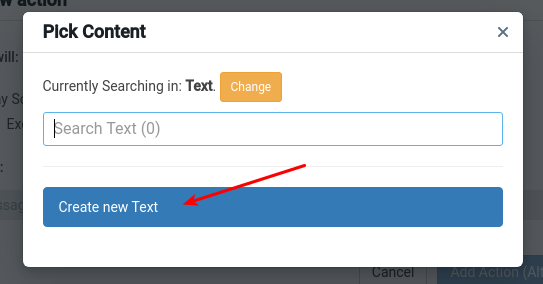
Click on "Create new Text":
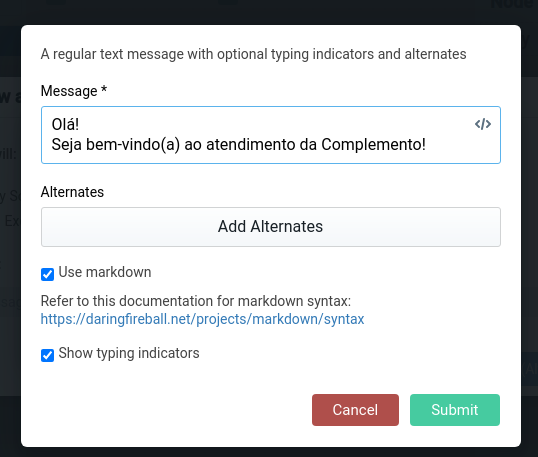
Add the text and click "Submit":
Finally, click on "Add Action":
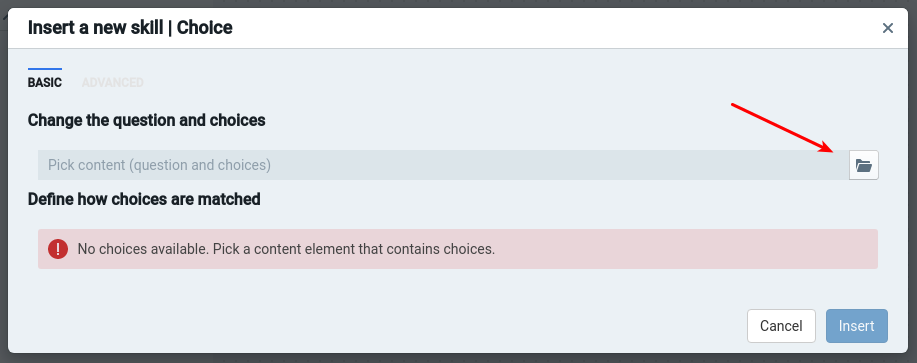
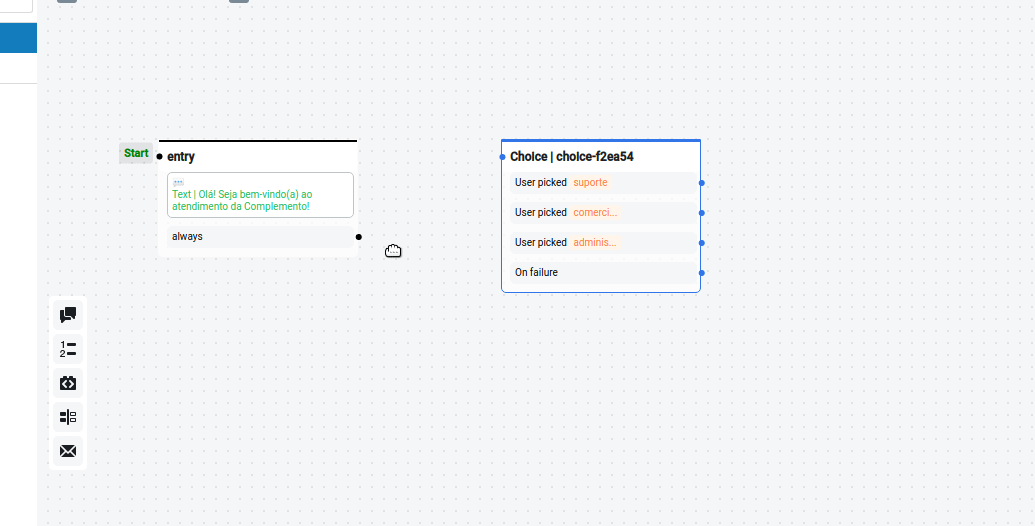
Now, let's add a new skill, which will allow the user to select the department that will proceed with the service. Let's then click and drag a skill "Choice" into the diagram:
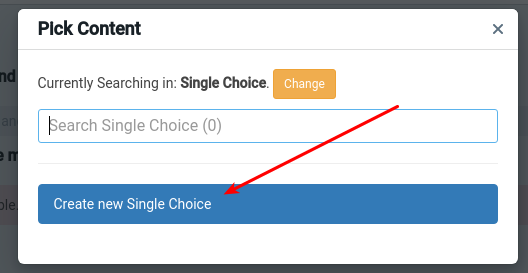
Now let's set up a new skill like "Choice". Click on Pastinha and then "Create single Choice":
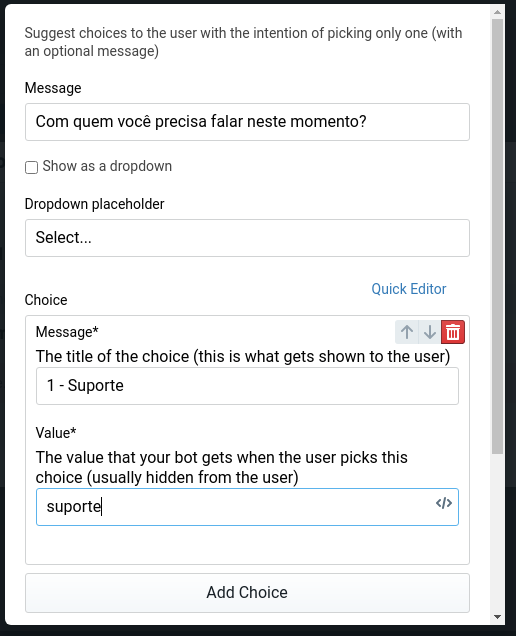
In this example, our URA will have 3 referrals: Support, Commercial or Administrative.
Initially, fill in the fields below and click "Add Choice" twice to total 3 options:
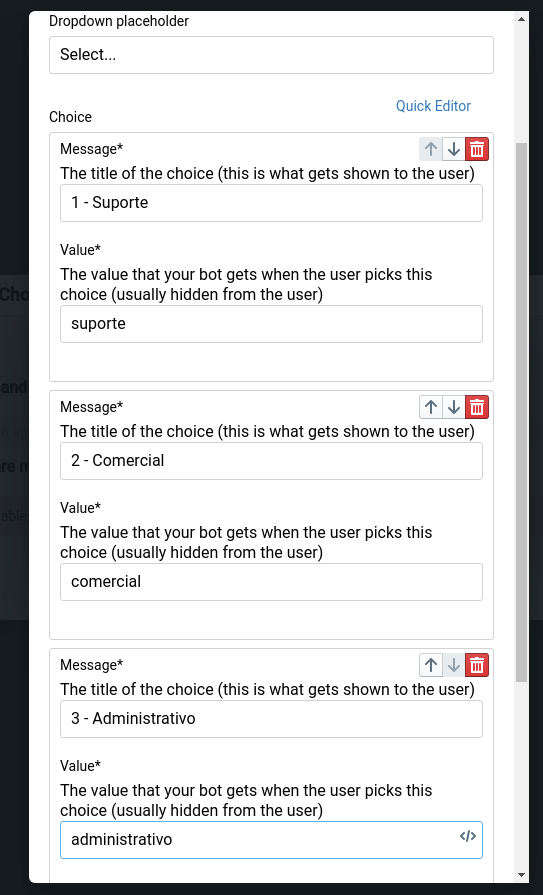
The end result will look like this:
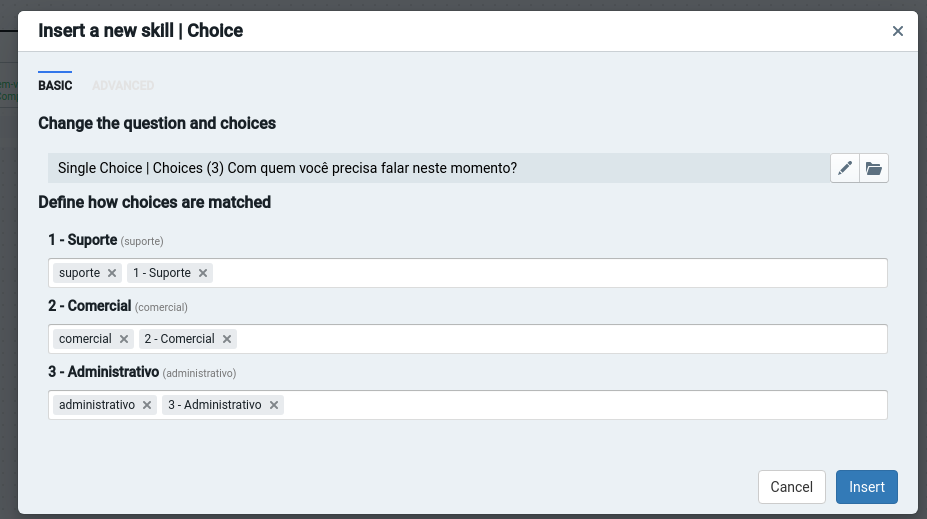
Then click “Submit” at the bottom of this screen.
Botpress will present the following screen with some ways to recognize the choices:
You can now supplement with a few more options by typing and pressing Enter to separate them:
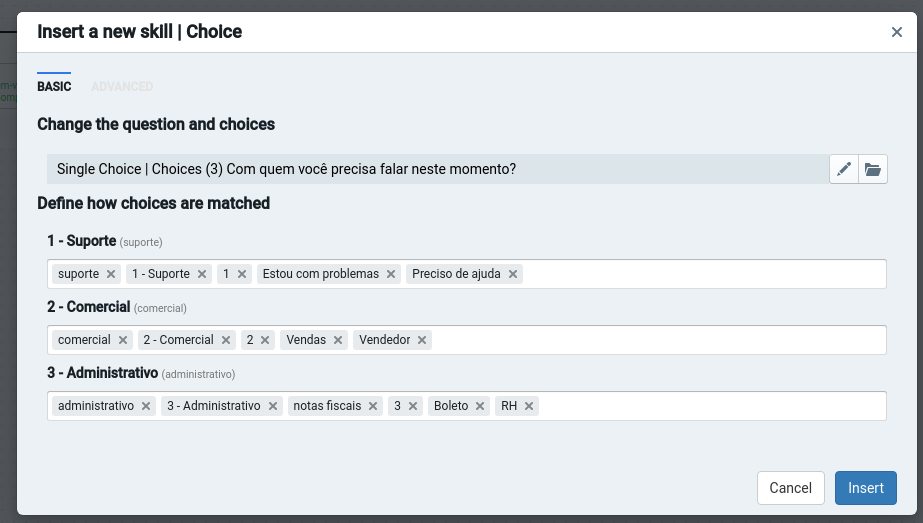
Click “Insert” when you're done.
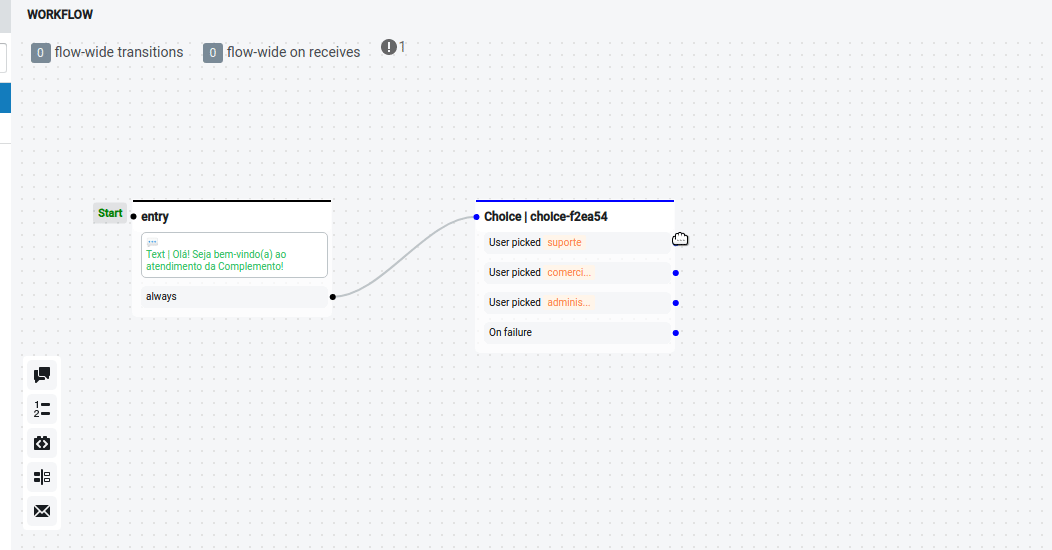
Now connect the input "entry" with the new skill "Choice" inserted in the diagram:
Now, let's create an alert text that will notify the visitor that he is being directed to a certain department.
To do this, click on the “bullet” of each available choice (“User picked support”, “Commercial user picked” and “Administrative user picked”), drag to the side and choose “Standard node”:
Now, just repeat the procedure you performed in the first step of Entry. Click on the first one you added, then click on the “+”, choose “Text”, create a text and insert in the flow of this node:
In the GIF above, I show you how to do this for “Transferring to support…”. Do the same with the two other flows (Commercial and Administrative).
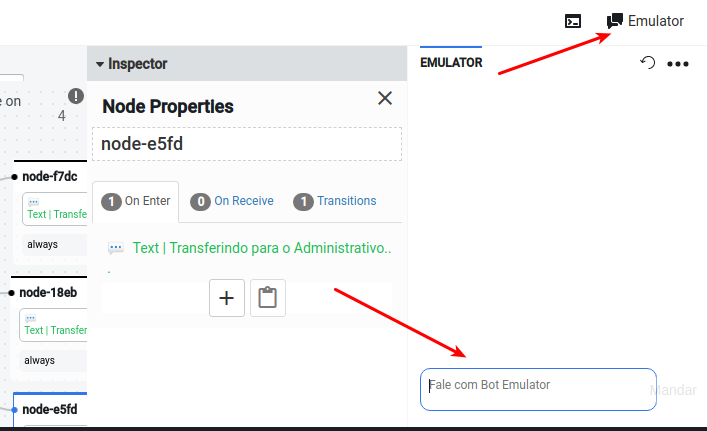
Testing the Flow
For you to test the flow, click on the "Emulator" button and start chatting with your BOT:
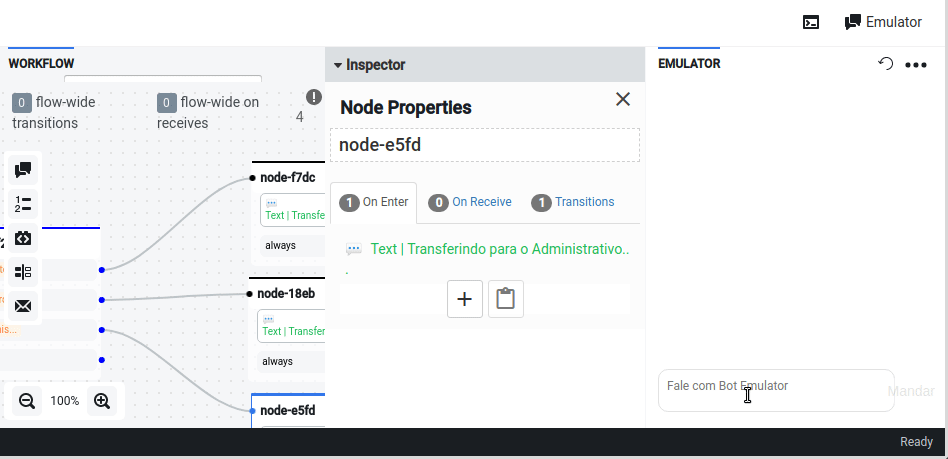
In practice:
With that we end this part of the tutorial.
In the next articles we will show how to make this bot available in Rocket.Chat and how to perform the transfer/overload department also in Rocket.Chat for a human.