Have a Question?
Chatbot – Integrando o Botpress com o Rocket.Chat
We developed this integration in order to make a chatbot created in Botpress respond to Rocket.Chat Omnichannel chats.
First, if you haven't seen how to create a chatbot with Botpress and even how to run a Botpress, I suggest you first look at the articles below, as we will use the URA example for this integration:
docker-compose.yml for Botpress
Creating a simple IVR Chatbot with Botpress
Enabling the Rocket.Chat Integration App
Access Rocket.Chat administration and perform the following steps:
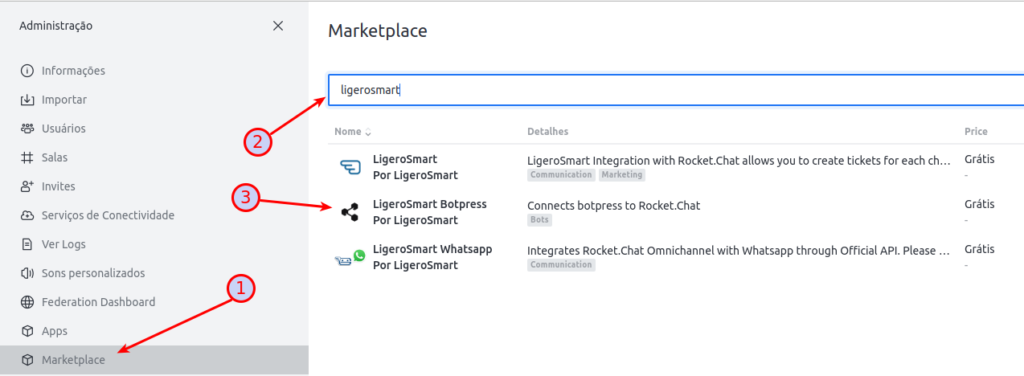
1 – Go to Marketplace
2 – Search for ligerosmart
3 – Click on LigeroSmart Botpress
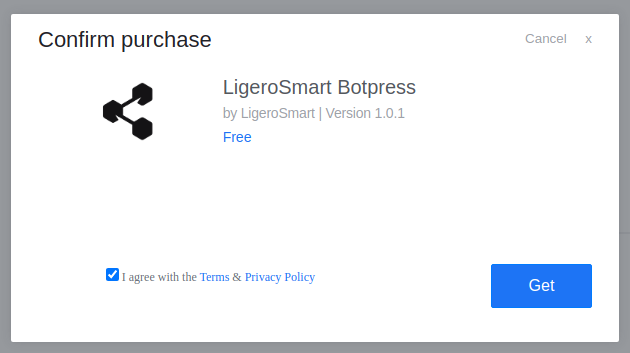
On the following screen, confirm that you agree with the terms and policies and click “Get”:
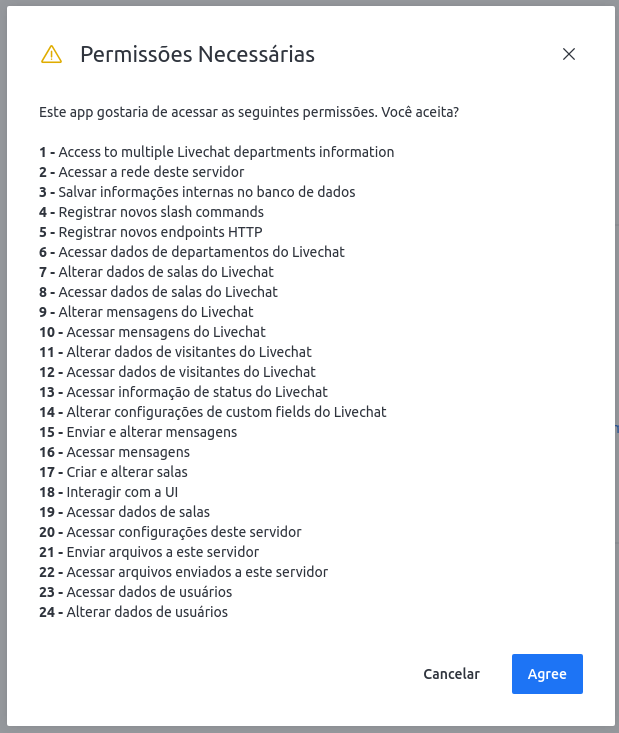
Then confirm the permissions by clicking "Agree":
Now fill in the fields on the APP settings screen:
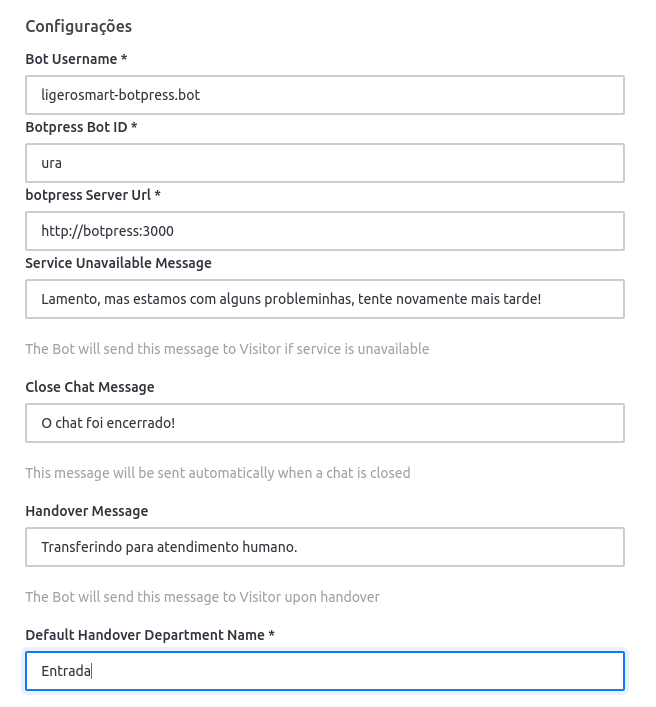
Important: When installing the application, Rocket.Chat itself creates a user. Just put it in the Bot Username field: ligerosmart-botpress.bot (You can associate with another user if you prefer)
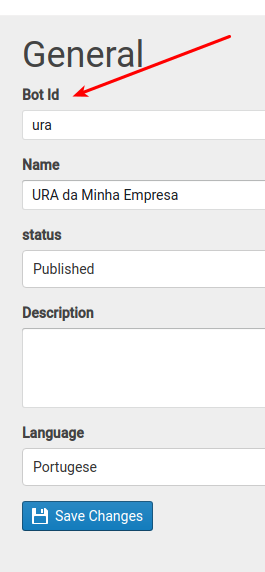
Botpress BOT ID is the ID of your Bot created in Botpress. You can consult it there in your Bot settings, in Botpress itself:
Finally, the URL can be your botpress's internal URL. Ideally, don't really expose your bot to the outside world 🙂
In the “Default Handover Department”, you can put a default Omnichannel department for some transfer cases, however this is rare.
Don't forget to click on “Save changes” in the upper right corner.
Adjusting the role of the bot user in Rocket.Chat
Now it is necessary for you to adjust the role of the user ligerosmart-botpress.bot so that it is effectively recognized as such! Access the Administration, then "Users":
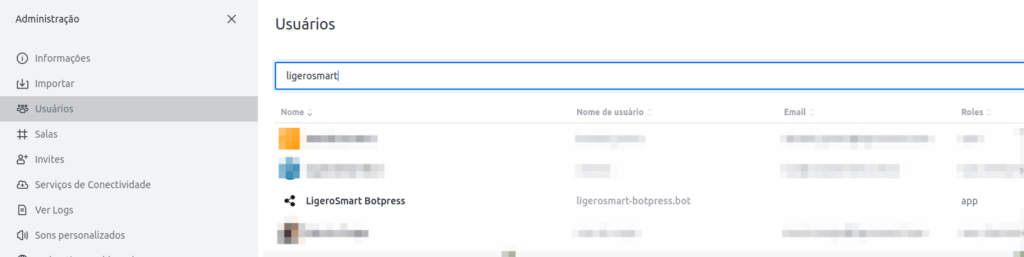
Search for ligerosmart, click on the LigeroSmart Botpress user, then on “Edit” and add the bot and Livechat Agent roles:
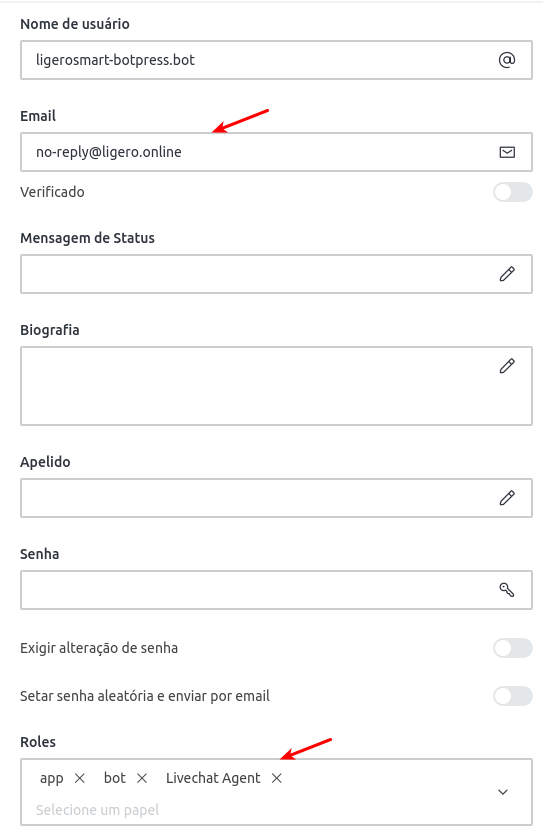
Important: You will need to set an email for the user before you can save.
In addition, you can also customize the username and the Bot Avatar on this same screen.
Omnichannel adjustments
In order to delegate new chats to the Bot, you will need to adjust a setting in Omnichannel's routing.
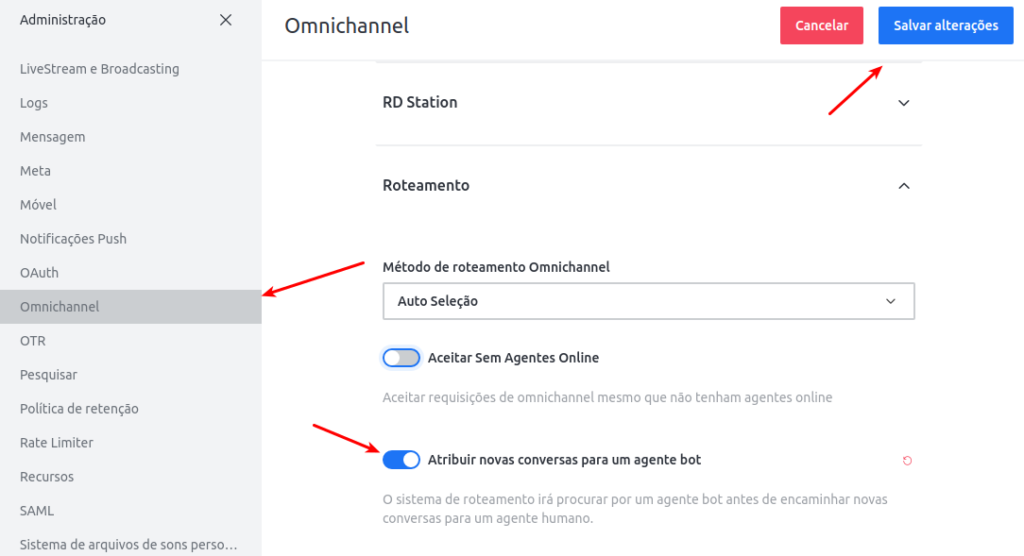
Then go to Administration -> Omnichannel. Look for the "Routing" section and Enable the option "Assign new conversations to a bot agent":
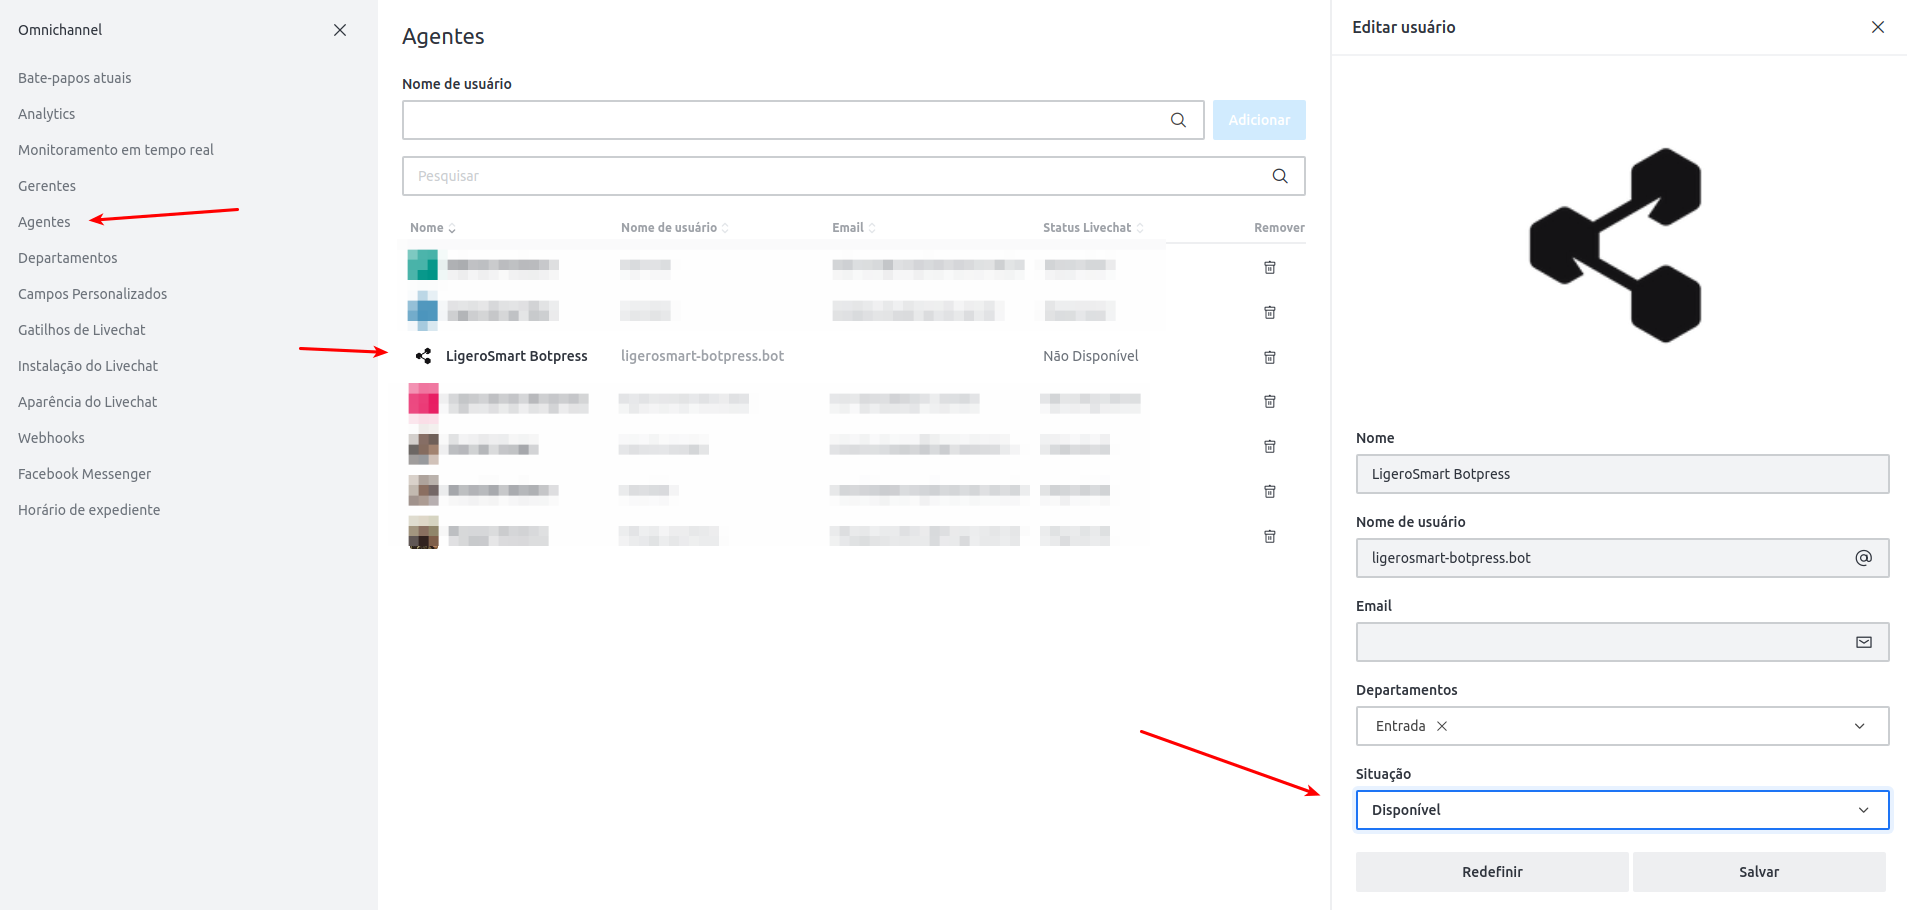
We also need to set the bot's status to “Available”. To do this, go to Omnichannel -> Agents -> LigeroSmart Botpress -> Edit
Make sure the agent's “Situation” is “Available”, otherwise adjust it.
testing the scenario
Finally, let's log into Omnichannel and create our first department to carry out the initial tests.
Go to Omnichannel -> Departments -> "+ New"
Fill in the fields as follows:
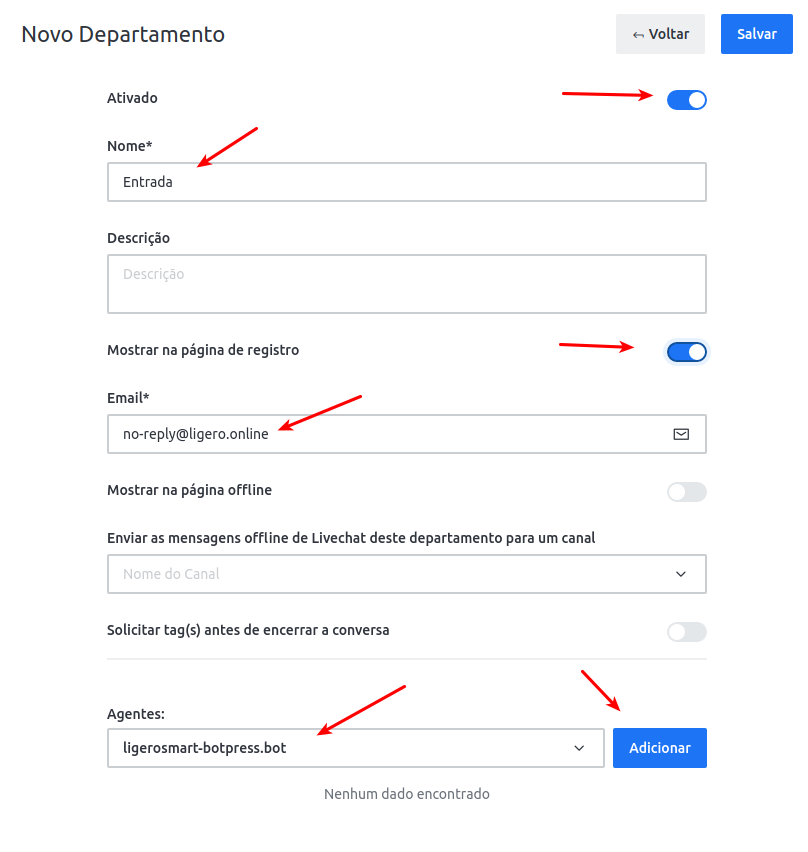
Important: Don't forget to click “Add” in Agents to add the Bot in this department.
Click Save after filling.
To perform our first test, access your Rocket.Chat livechat. Just put “/livechat” at the end of your Rocket.Chat server address:
https://meurocket.minhaempresa.com/livechat

With that we conclude this article.
In the next one, we'll show you how to effectively transfer between departments in Rocket.Chat and complete our IVR.